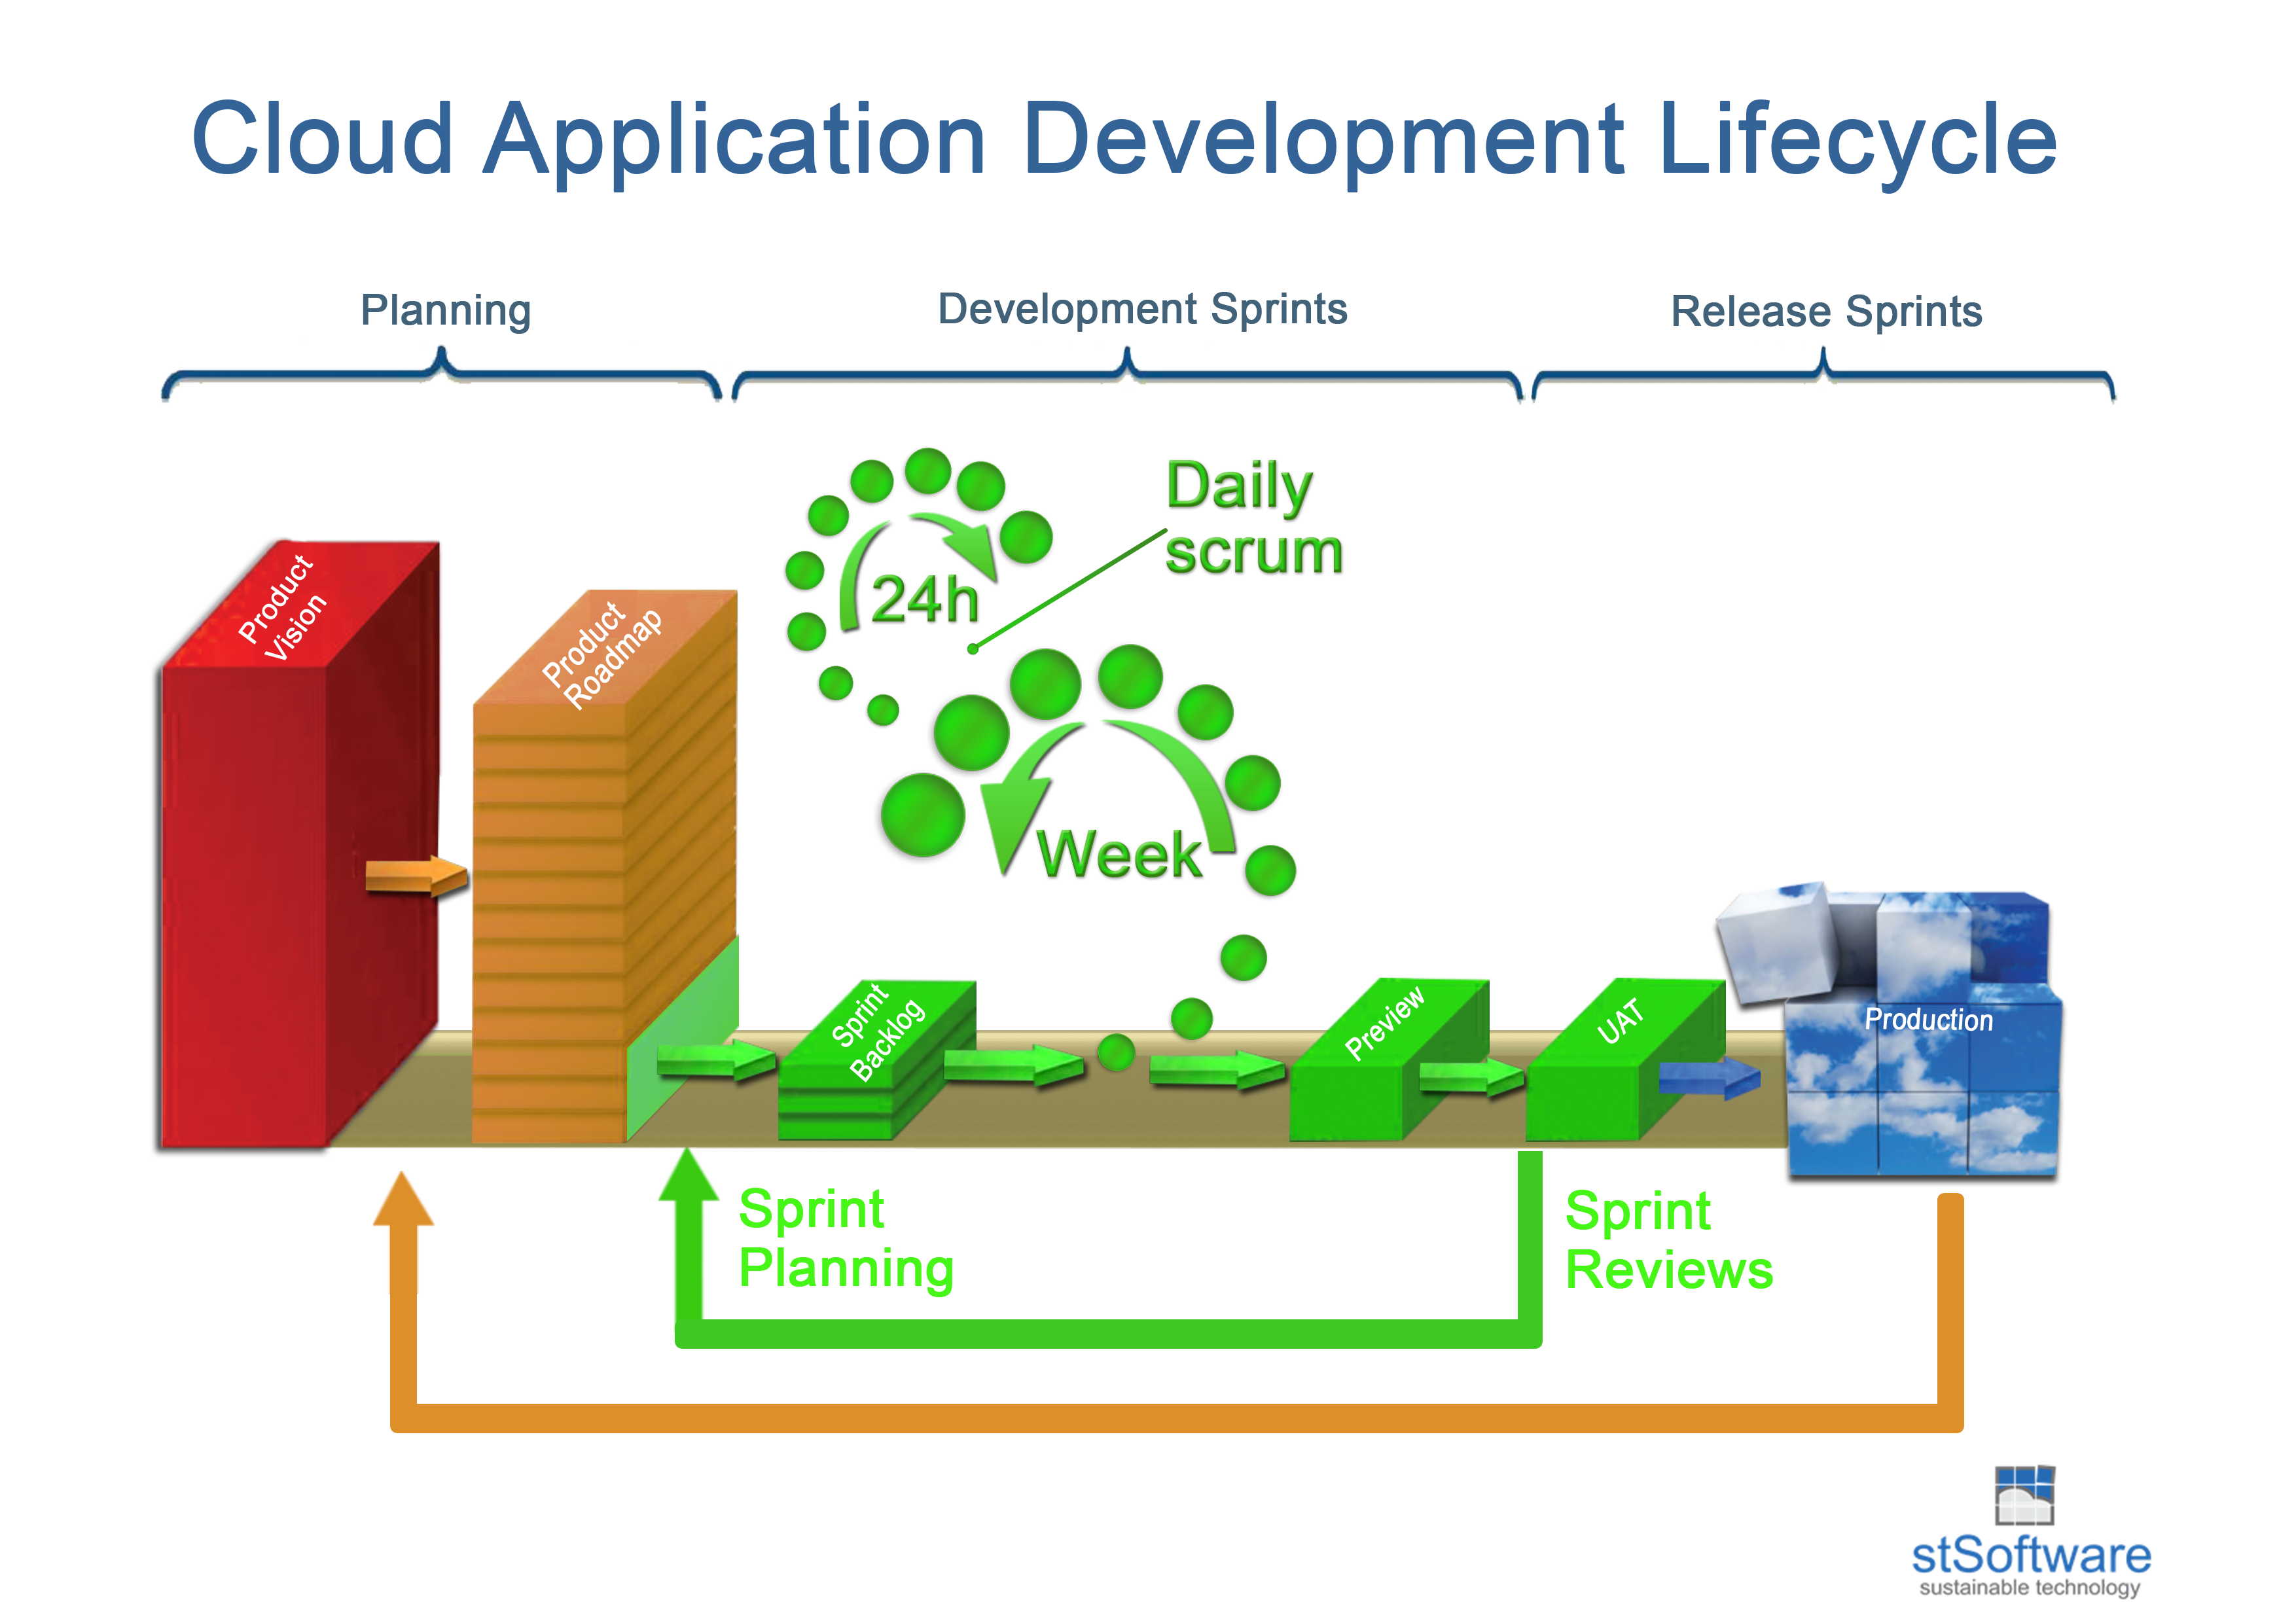
Cloud Application Development Lifecycle
:
Agile project management and product release schedule
Overview
The stSoftware application life cycle consists of weekly incremental releases with stake holder planning and demostrations. The release cycle is two weeks from the planning phase to feature release, features are broken down into small enough tasks to be able to fit into the two week release cycle. This project management methodology is known as Agile/Scrum
Agile project management is broken up into three main phases:-
- Planning
- Development Sprints
- Release Sprints
stSoftware cloud systems have three main environments:-
- Edge - Latest build which has passed all automated tests.
- UAT - The last promoted "Preview" build after the end of the development sprint
- Production - Promoted from "UAT" after the user test period.
(source)
Agile principles
The Agile Manifesto is based on twelve principles:
- Customer satisfaction by rapid delivery of useful software
- Welcome changing requirements, even late in development
- Working software is delivered frequently (weeks rather than months)
- Close, daily cooperation between business people and developers
- Projects are built around motivated individuals, who should be trusted
- Face-to-face conversation is the best form of communication (co-location)
- Working software is the principal measure of progress
- Sustainable development, able to maintain a constant pace
- Continuous attention to technical excellence and good design
- Simplicity—the art of maximizing the amount of work not done—is essential
- Self-organizing teams
- Regular adaptation to changing circumstances
Planning Phase
There are three main activities in the planning phase.
- Product Vision
- Grand statements
- Business long term goals
- Major system features
- Gap Analysis & System Design
- Business Analyst Programmer analyses the Gap between the Product Vision and the generic stSoftware product
- The initial system design is developed
- These processes guide the Product Roadmap
- Product Roadmap
- Each task is estimated by the developers.
- Any task dependencies are added as additional tasks.
- The priority of each task is given by the business owner.
- Large tasks are broken down into multiple smaller tasks which are less than 1 week of development effort.
Development Sprints
A sprint (or iteration) is the basic unit of development in the agile development lifecycle. The sprint is a "timeboxed" effort; that is, it is restricted to a specific duration. The duration is fixed in advance for each sprint and is typically one week.
Each sprint is started by a planning meeting, where the tasks for the sprint are identified and an estimated commitment for the sprint goal is made, and ended by a sprint review, where the progress is reviewed and lessons for the next sprint are identified.
Sprint backlog
Each development sprint is one week in length, a set of coherent tasks are taken from the "product roadmap" based on the priority given by the business user. The set of tasks "sprint backlog" including any dependencies are chosen to be a estimated week of total developer team effort.
Daily scrum
The developer team meeting for 15 minutes to review yesterday's progress and plan today's tasks.
Incremental Release
When a feature set is completed and the automated tests ( ~6,000) for the whole system are clean the system build is released to the “preview” environment. A manual "smoke" test is done on the "preview" enviroment once released.
Release Sprints
Release to UAT
After the end of the "development sprint" the last incremental "preview" release with a report of the tasks completed is promoted to UAT environment.
At the end of a sprint cycle, two meetings are held: the "Sprint Review Meeting" and the "Sprint Retrospective".
At the Sprint Review Meeting:
-
- Review the work that was completed and the planned work that was not completed
- Present the completed work to the stakeholders (a.k.a. "the demo")
- Incomplete work cannot be demonstrated
At the Sprint Retrospective:
-
- All team members reflect on the past sprint
- Make continuous process improvements
- Two main questions are asked in the sprint retrospective: What went well during the sprint? What could be improved in the next sprint?
Release to Production
The "UAT" release is matured for a one week period. Business users are able to test the upcoming release in the UAT environment, if no regression issues are found then the UAT release is promoted into the "production" environment. Feature sets are disabled or reverted before promotion if required. The promoted “UAT” releases propergated throughout the production server cluster progressively using a rolling restart of each web server so that there is no visible outage of the system.